Connect claude.ai
This walks you through connecting claude.ai (in the browser) to Assemblified as a custom connector, so you can ask Claude about your bills of materials, sub-assemblies, and raw materials. This walkthrough shows the default read-only flow — the access level is chosen when you generate the connection code (see Connect claude.ai or ChatGPT).
Before you start
Section titled “Before you start”- An active Assemblified subscription (LLM / API Access is in open beta).
- A claude.ai account that supports adding a custom connector.
Step 1 — Generate your connection code in Assemblified
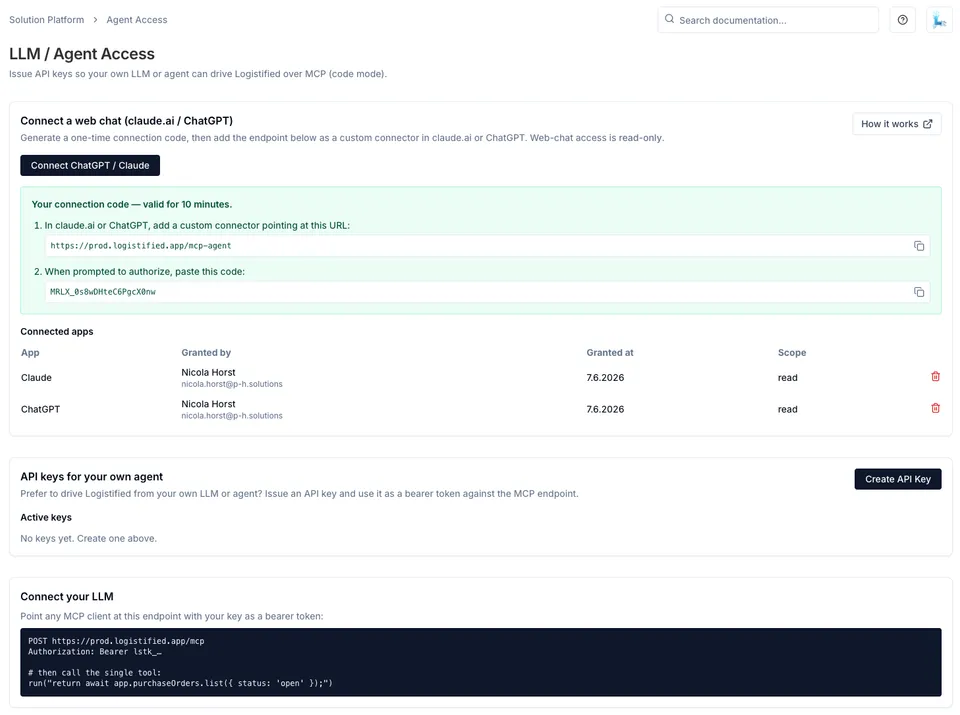
Section titled “Step 1 — Generate your connection code in Assemblified”In Assemblified, generate the one-time code you’ll paste back into claude.ai at the end.
- Open Settings → LLM / API Access.
- In the Connect a web chat (claude.ai / ChatGPT) card, click Connect ChatGPT / Claude.
- Copy the connector URL (it ends in
/mcp-agent) and the one-time connection code. Both are valid for 10 minutes.
Step 2 — Add a custom connector in claude.ai
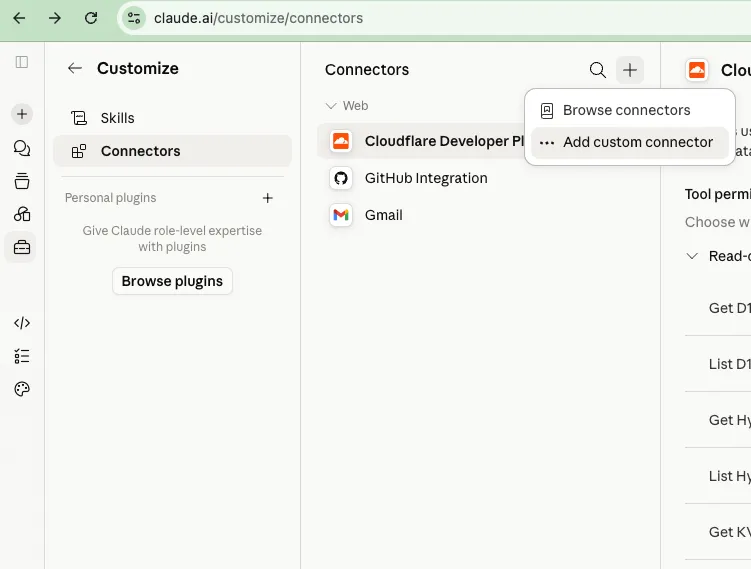
Section titled “Step 2 — Add a custom connector in claude.ai”- Go to claude.ai/customize/connectors (Customize → Connectors).
- Click the + icon at the top of the Connectors panel.
- Choose Add custom connector.
Step 3 — Enter the connector details
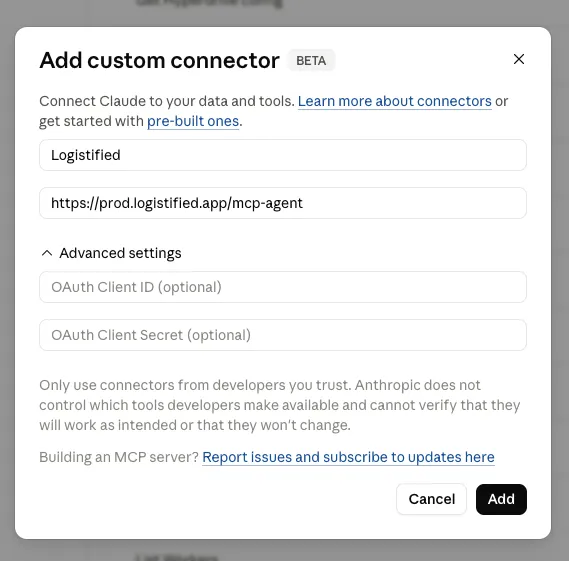
Section titled “Step 3 — Enter the connector details”- Name:
Assemblified. - URL: paste the
/mcp-agentURL from Step 1 —https://assemblified.com/mcp-agent. - Leave the Advanced settings (OAuth Client ID / Secret) blank — they aren’t needed.
- Click Add.
Step 4 — Connect and approve read-only access
Section titled “Step 4 — Connect and approve read-only access”- On the new Assemblified connector, click Connect.
- Claude forwards you to Assemblified’s Connect to Assemblified screen at
https://assemblified.com/mcp-agent. - Paste the connection code you copied in Step 1 and click Approve read-only access.
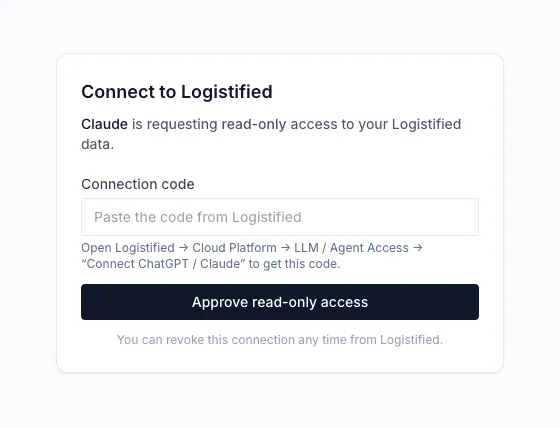
Once approved, you’re back in claude.ai and connected. The connector also shows up in the Connected apps table on the LLM / API Access page in Assemblified.
Try it out
Section titled “Try it out”Ask Claude something in plain language, such as “Which of my raw materials aren’t used in any BOM yet?” It reads the answer live from your store.
See also
Section titled “See also”- Connect claude.ai or ChatGPT — the shared overview of this flow.
- Connect ChatGPT — the same flow for ChatGPT.
- Managing access & security — revoking connected apps.